This content was originally posted to the Trek View blog on 2021-10-22. Some of the information found in it may now be outdated.
Overlay a logo file onto an equirectangular photo to create a branded nadir.
1. Prep
The logo I’ll use for the demo;
If you want to use your own logo, make sure its dimensions are square. The higher the resolution, the better (it will be scaled later)
You can use a logo with a transparent background (in .png format).
You’ll also need to install imagemagick.
2. Convert the logo to an equirectangular projection
# Rotate 180 degrees + DePolar Distortion + Flip + Flop
magick trek-view-square-nadir.png -rotate 180 trek-view-square-nadir-1.png && \
magick trek-view-square-nadir-1.png -distort DePolar 0 trek-view-square-nadir-2.png && \
magick trek-view-square-nadir-2.png -flip trek-view-square-nadir-3.png && \
magick trek-view-square-nadir-3.png -flop trek-view-square-nadir-4.png
3. Resize the equirectangular logo
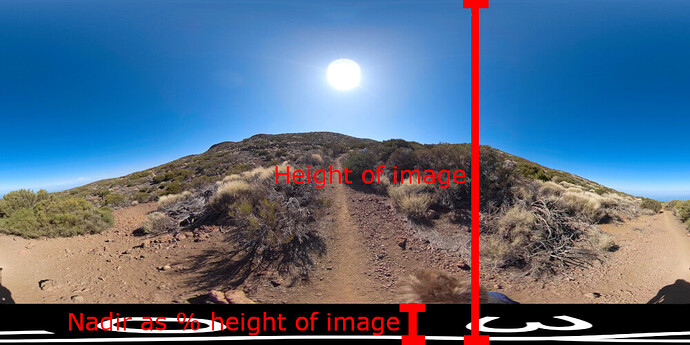
Generally a nadir takes up between 10% - 25% of the image (as a % of height).
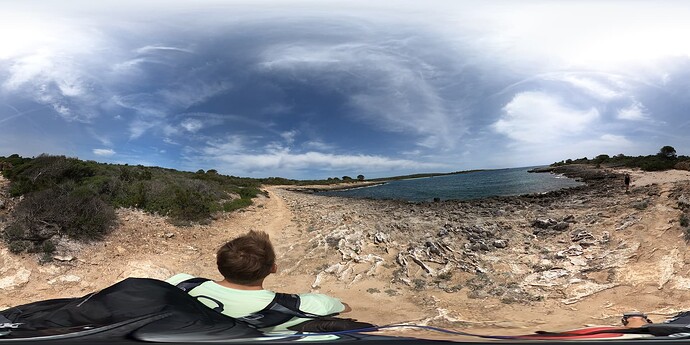
Lets say the image I want to overlay the logo on is 5760x2880 (a GoPro Max 360 photo). GSAF5431.JPG;
If I wanted a nadir that covered 25% of the image, I’d calculate it would need to be 720 pixels high (2880*0.25 = 720).
I’d also need to make the nadir 5760 wide to cover the base of the image.
magick trek-view-square-nadir-4.png -geometry 5760x720! trek-view-square-nadir-5760x2880.png
Note the ! in the dimensions instructing Imagemagick to ignore aspect ratio. See the Imagemagick docs for more information.
A second example for clarity
Take GoPro 5.6k video where the frames measure 2688x5376.
If I wanted a nadir that covered 25% of the image, I’d calculate it would need to be 672 pixels high (2688*0.25 = 672).
magick trek-view-square-nadir-4.png -geometry 5376x672! trek-view-square-nadir-5376x2688.png
4. Overlay the nadir
All that’s left to do now is overlay the equirectangular nadir created onto the photo.
We need to know where to place the nadir vertically. To calculate this; we know the photo is 2880 in height and the nadir 720 in height, so:
2880-720 = 2160 (the vertical offset position).
composite trek-view-square-nadir-5760x2880.png GSAF5431.JPG -geometry +0+2160 GSAF5431-nadir.JPG
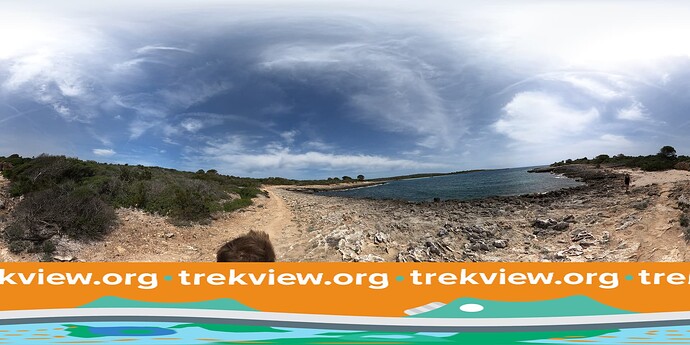
Give us GSAF5431-nadir.JPG;
Loaded into a 360 viewer;
5. Automate it
Once you have an equirectangular nadir, it’s easy to automate the process of applying it to all image in a directory.
Create a file called overlay_images.py.
In it paste the code;
import os
import subprocess
import argparse

def overlay_images(nadir_path, base_dir, output_dir, geometry):
    # Ensure the output directory exists
    os.makedirs(output_dir, exist_ok=True)

    # Get a list of all image files in the base directory
    for file_name in os.listdir(base_dir):
        # Construct full file path
        base_image_path = os.path.join(base_dir, file_name)

        # Check if the file is an image
        if base_image_path.lower().endswith(('.jpg', '.jpeg', '.png')):
            # Define the output file path with "-nadir" appended before the extension
            name, ext = os.path.splitext(file_name)
            output_image_path = os.path.join(output_dir, f"{name}-nadir{ext}")

            # Run the `composite` command
            try:
                subprocess.run(
                    [
                        "composite",
                        nadir_path,
                        base_image_path,
                        "-geometry", geometry,
                        output_image_path
                    ],
                    check=True
                )
                print(f"Overlayed {file_name} successfully. Saved as {output_image_path}")
            except subprocess.CalledProcessError as e:
                print(f"Failed to overlay {file_name}: {e}")

def main():
    # Set up CLI argument parsing
    parser = argparse.ArgumentParser(description="Overlay an image onto all images in a directory.")
    parser.add_argument("--nadir", required=True, help="Path to the overlay image (nadir).")
    parser.add_argument("--base_dir", required=True, help="Path to the directory containing base images.")
    parser.add_argument("--output_dir", default="./output", help="Directory to save output images. Defaults to './output'.")
    parser.add_argument("--geometry", default="+0+4320", help="Position for the overlay image (default: '+0+4320').")

    args = parser.parse_args()

    # Call the overlay function with provided arguments
    overlay_images(args.nadir, args.base_dir, args.output_dir, args.geometry)

if __name__ == "__main__":
    main()
Now run it
python3 overlay_images.py\
  --nadir /path/to/nadir.png \
  --base_dir /path/to/base_images/ \
  --geometry +0+2160 \
  --output_dir /path/to/output_images/
- Replace
/path/to/nadir.pngwith the path to the overlay image (e.g.trek-view-square-nadir-5760x2880.png) - Replace
/path/to/base_images/with the path to the directory containing base images. - Replace
+0+2160with the geometry for your nadir/photo - Replace
/path/to/output_images/with the directory where you want the final photos to reside


